As a designer, you’ve probably felt overwhelmed when many projects need your attention at once. Clients call their changes “urgent,” team members push for faster work, and deadlines seem to grow overnight.
The truth is, not everything can be truly urgent – but knowing how to sort what matters most from what just feels pressing is a skill that can change your workflow and reduce stress.
Good project prioritization isn’t just about managing time; it’s about making smart choices that match business goals, client needs, and your own growth. Let’s look at proven methods and practical tips that will help you take back control of your design workload.
TL;DR
Feeling overwhelmed by urgent design projects?
- Use a simple 6-step framework
- Use the MoSCoW method
- Check real urgency, find what matters most, look at project difficulty, think about who’s involved, handle timelines well, and stay ready to change.
- Set clear boundaries with clients, use tools to track priorities, and remember that not everything is truly urgent.
Why Everything Feels Urgent
Before looking at prioritization methods, it’s important to understand why everything feels urgent in the first place. In design work, several things add to this problem:
- Client worry often creates rushed timelines. When clients spend money on design, they want to see results quickly and may think any delay means lost opportunities.
- Unclear project boundaries create fake urgency. When project limits aren’t clear, extra requests make every task feel like a priority.
- Poor team communication can make urgency worse. When information doesn’t flow well, last-minute requests become normal instead of rare.
- Creative perfectionism can make us feel like every project needs maximum attention, making it hard to know when “good enough” is actually fine for certain work.
Understanding these patterns helps you approach prioritization with a clearer mind, separating real urgency from felt pressure.
If you’re juggling work for several clients or business verticals, it’s essential to know what to tackle first. Here’s how to manage creative work for multiple clients without losing momentum.
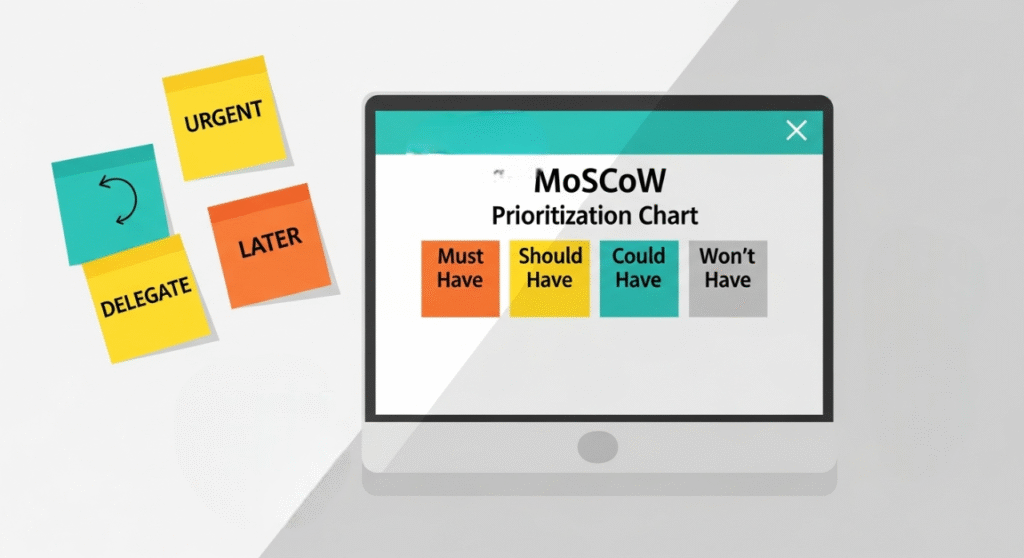
The MoSCoW Method for Design Projects
One of the most effective frameworks for design prioritization is the MoSCoW method, adapted specifically for creative work:
- Must Have projects are those with fixed deadlines tied to product launches, legal requirements, or contractual obligations. These are your non-negotiables.
- Should Have projects significantly impact business goals or client satisfaction but have some flexibility in timing. These often include major brand updates or key marketing campaigns.
- Could Have projects would be nice to complete but won’t cause significant problems if delayed. Think exploratory concepts or nice-to-have enhancements.
- Won’t Have (this time) projects are explicitly moved to future phases. Having this category prevents scope creep and manages expectations clearly.
When applying this method, document your reasoning for each categorization. This creates transparency with stakeholders and helps you defend your prioritization decisions when questioned.
Applying a structured system like MoSCoW works even better when your creative workflows are organized. Learn how to build affordable design systems as a one-person brand to support that process.
The Six-Step Design Priority Framework
Good design prioritization follows six simple steps that help you make smart choices about your work:
1. Check How Urgent Things Really Are
Real urgent work has clear signs that set it apart from fake pressure. Ask yourself: Does this project have a hard deadline (like a product launch or legal requirement)? Will waiting one week cause real business problems? If the answer is no, it’s probably just pressure, not true urgency.
2. Figure Out What Matters Most
What matters most connects to long-term goals and business success. A project might not be urgent but could be key for growing the business, building the brand, or keeping clients happy.
Think about: How does this help reach business goals? What impact will this have on money or user experience? Will this project create value after it’s done?
3. Look at How Hard Each Project Is
How hard a project is affects your time and what you need to complete it. Break down projects by how technically difficult they are, how much creative work they need, and how many people must work together.
Easy projects can often be finished quickly to keep things moving, while hard projects need focused time and careful planning.
One of the best ways to simplify project planning is by building reusable creative assets. Learn how to do this in Building a Design Asset Library for Your Marketing Clients.
4. Think About Who’s Involved
Different people bring different levels of power and pressure to projects. Think about the client’s business needs, your team’s other work, and outside deadlines.
A CEO’s request carries more weight than a marketing person’s idea, though both deserve professional attention.
5. Handle Timeline Expectations
Good timeline handling means building realistic schedules that include revision time, approval steps, and possible problems. Create extra time for unexpected changes and clearly explain your timeline assumptions to prevent last-minute stress.
6. Stay Ready to Change
Priorities change as business needs shift, new information comes in, and market conditions change. Build the ability to change into your workflow by regularly reviewing priorities and keeping some time available for real urgent requests that might come up.
Setting Boundaries with Stakeholders
Effective prioritization requires clear communication with everyone involved in your projects. Here’s how to establish healthy boundaries:
- Create a project intake process that requires stakeholders to define urgency with specific business reasons. Ask questions like “What happens if this waits until next week?” or “What business goal does this serve?”
- Establish regular check-in schedules instead of allowing constant interruptions. When stakeholders know they’ll have dedicated time to discuss projects, they’re less likely to mark everything as urgent.
- Use visual project boards that show your current workload. Tools like Trello, Asana, or even a simple shared spreadsheet can help others understand your capacity and current commitments.
- Implement a revision limit policy for each project phase. Unlimited revisions create endless urgency cycles and prevent you from moving forward with other priorities.
- Document all priority changes in writing. When someone wants to reprioritize work, having them confirm the change via email creates accountability and helps track pattern changes in requirements.
Time-Blocking Strategies for Designers
Once you’ve established priorities, time-blocking ensures your schedule reflects your decisions:
- Protect deep work time for high-impact projects. Creative work requires focused attention, so block 2-3 hour chunks for complex design tasks without interruptions.
- Batch similar activities together. Group all client calls, administrative tasks, or revision work into specific time blocks rather than scattering them throughout your day.
- Build buffer time around project deadlines. Design work often involves unexpected revisions or technical challenges, so padding your timeline prevents one delayed project from derailing everything else.
- Schedule regular priority review sessions weekly or bi-weekly. As projects evolve and new requests emerge, your priorities need regular reassessment to stay relevant.
- Reserve emergency slots in your calendar. Having pre-planned flexibility helps you handle genuine urgent requests without completely disrupting your planned work.
Tools and Systems for Priority Management
The right tools can make prioritization systematic rather than reactive:
- Project management platforms like Monday, Clickup, or Notion allow you to assign priority levels, track dependencies, and visualize workloads across multiple projects.
- Time tracking applications such as Toggl or Harvest help you understand how long different types of work actually take, improving future priority assessments and deadline estimates.
- Client communication tools like Slack channels or dedicated project portals centralize requests and prevent the scattered email urgency that makes everything feel immediate.
- Calendar blocking applications ensure your priorities get actual time allocation, not just theoretical importance rankings.
- Automated workflow tools can handle routine tasks, freeing up time for high-priority creative work that requires human attention.
Remember that tools are only as effective as the systems you create around them. Choose platforms that integrate well with your existing workflow rather than adding complexity.
Communicating Priorities to Your Team
If you work with other designers, developers, or project managers, aligned prioritization becomes crucial:
- Hold brief daily standup meetings where everyone shares their top three priorities. This prevents duplicate efforts and identifies potential conflicts early.
- Create shared priority documentation that everyone can reference. When team members understand the reasoning behind priorities, they can make better independent decisions.
- Establish escalation protocols for when priorities conflict between team members or departments. Having a clear process prevents priority paralysis.
- Regularly celebrate completed priorities rather than just focusing on what’s next. Acknowledging progress helps maintain momentum and team morale.
- Cross-train team members on different project types so urgent requests don’t always bottleneck with one person.
Measuring the Success of Your Prioritization
Effective prioritization should produce measurable improvements in your work life:
- Track project completion rates and notice if you’re finishing more projects on time since implementing systematic prioritization.
- Monitor client satisfaction scores or feedback quality. Better prioritization often leads to happier clients because their most important needs get addressed first.
- Assess your stress levels and work-life balance. If prioritization is working, you should feel more in control and less reactive to daily demands.
- Evaluate revenue impact for freelancers or agency designers. Focusing on high-impact work should correlate with better business outcomes.
- Review learning and growth opportunities in your work. Good prioritization should include time for skill development and creative exploration, not just deadline management.
Document these metrics regularly so you can adjust your prioritization approach based on actual results rather than assumptions.
Common Pitfalls and How to Avoid Them
Even with good systems, several common mistakes can undermine your prioritization efforts:
- Over-promising deadlines to appear responsive often creates artificial urgency later. It’s better to set realistic expectations upfront than to create crisis situations through optimistic scheduling.
- Failing to say no to low-priority requests can gradually fill your schedule with less important work. Practice polite but firm declination of requests that don’t align with your established priorities.
- Ignoring energy levels when scheduling priorities can reduce work quality. Match your most challenging priorities with times when you typically have the most creative energy.
- Perfectionism on lower-priority items wastes time that should go toward more important projects. Develop different quality standards for different priority levels.
- Not updating priorities as circumstances change can leave you working on outdated assumptions. Regular priority reviews should be non-negotiable parts of your workflow.
Key Takeaways
- Use the 6-step framework: Check urgency, find what matters, look at difficulty, think about people involved, handle timelines, and stay flexible
- Set clear boundaries: Create project intake processes and regular check-ins instead of allowing constant interruptions
- Distinguish real from fake urgency: Ask specific questions about business impact and fixed deadlines
- Use the MoSCoW method: Categorize projects as Must Have, Should Have, Could Have, or Won’t Have
- Block time for priorities: Protect deep work time and batch similar activities together
- Track and measure success: Monitor completion rates, client happiness, and your stress levels
Moving Forward with Confidence
Implementing effective project prioritization is a skill that develops over time. Start by choosing one framework from this guide and applying it consistently for two weeks. Notice what works for your specific situation and what needs adjustment.
Remember that perfect prioritization isn’t the goal – better decision-making is. Every small improvement in how you evaluate and sequence your work will compound over time, leading to reduced stress, better client relationships, and more satisfying creative output.
The key is moving from reactive urgency to proactive prioritization. When you have clear systems for evaluating what matters most, you can focus your creative energy on work that truly makes a difference rather than just responding to whoever requests attention most loudly.
Your time and creative abilities are valuable resources. Treating them with the smart consideration they deserve will not only improve your work life but also enhance the quality and impact of every project you complete.
Frequently Asked Questions
How do I handle clients who say everything is urgent?
Create a simple urgency scale (1-5) and ask clients to rate each request with a business reason. Most “urgent” requests drop to 2-3 when clients must explain the real impact. You can also offer rush pricing for truly urgent work – this often reveals what’s actually important.
What tools work best for design project prioritization?
Start simple with tools you already know. Trello, Asana, or even a shared Google Sheet work well. The key is consistent use, not fancy features. Choose one tool and stick with it for at least a month before switching.
How often should I review and update my priorities?
Review priorities weekly for ongoing projects and daily for immediate tasks. Set a recurring 30-minute meeting with yourself every Monday to reassess what’s most important for the week ahead.
What if my manager or client disagrees with my priorities?
Document your reasoning clearly and present alternatives, not just problems. Say “I can do Project A by Friday or Project B by Wednesday – which creates more value for the business?” This shows you’re thinking strategically, not just pushing back.
How do I prioritize when deadlines conflict?
Look at the real consequences of each deadline. Can one be moved by a few days? Is one deadline based on preference while another is contractual? Communicate early with all parties about conflicts rather than hoping you can do everything.
Should I prioritize easier tasks first to build momentum?
Use a mix approach. Start your day with one quick win for momentum, then tackle your most important (not necessarily easiest) task when your energy is highest. Save batch tasks like email and admin work for low-energy times.